
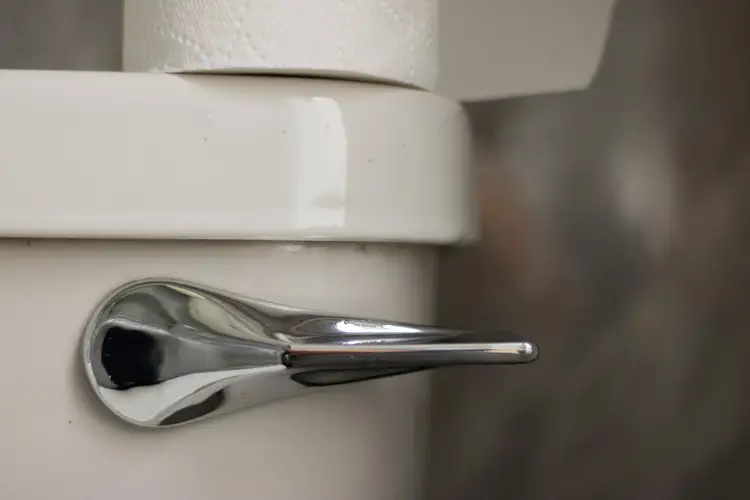
The toilet handle is an integral component of a household bathroom. It is pivotal in initiating the flush cycle that disposes of waste. The mechanism behind it may seem simple, yet it plays a crucial role in ensuring the convenience and hygiene of our daily routines. A toilet handle operates by engaging the flushing mechanism inside the tank. Upon activation, it lifts the flapper or drop valve. Thus, allowing water to flow from the tank into the bowl. Then, it flushes away waste. In this article, you will learn about signs that a toilet handle is not working, materials you will need, as well as steps on how to fix a toilet handle.
Let’s dive more into this topic!
Signs the Toilet Handle is Not Working
If you notice the handle is overly loose, sticking, or requires excessive force to activate, these are clear indications of malfunction. Additionally, if depressing the handle doesn’t result in a flush or there’s a delay before the toilet responds, this suggests a problem with the handle. It could also be an issue with its connection to the flush mechanism.
Materials Needed to Fix a Toilet Handle
To resolve issues with your toilet handle, gather the following materials:
- Adjustable wrench or pliers
- Replacement toilet handle (if necessary)
- Sponge or towel (for potential water cleanup)
- Gloves for sanitation
Steps to Fix a Toilet Handle
Now that you know the materials that you need to fix the toilet handle, let’s look at the steps to take to do this.
- Shut Off Water Supply: Prevent water flow to the toilet by turning off the valve. This is usually located at the base or rear.
- Drain Tank and Remove Lid: Flush the toilet to drain the water out of the tank. Next, remove the tank lid carefully.
- Disconnect Chain: Unhook the lift chain from the lever.
- Unscrew Nut: Using an adjustable wrench, unscrew the locknut that holds the toilet handle in place from the inside of the tank. It’s often reversed threaded, so turn clockwise to loosen.
- Remove Old Handle: Slide the old handle out through the hole in the tank.
- Insert New Handle: Place the new handle into the hole. Secure it inside the tank with the locknut, turning counterclockwise to tighten.
- Reattach Chain: Hook the lift chain back onto the new lever. Adjust the length if necessary so that it will lift properly when the handle is engaged.
- Test Flush Mechanism: Turn the water supply back on and allow the tank to refill. Test the new handle several times to ensure it activates the flush mechanism effectively.
- Adjust as Needed: If the handle does not work correctly on the first try, make adjustments to the chain length and ensure all connections are secure.
Maintenance of Toilet Handle
Regular maintenance includes cleaning the handle, checking the tightness of the nut, and examining the condition of the lift chain and its attachment points. With proper upkeep, the need for repairs should be minimal.
Common Issues With Toilets
Common issues with toilets can range from minor annoyances to significant problems that require immediate attention. Here are some of the most prevalent toilet issues:
- Clogs: One of the most common toilet issues is a clog. This occurs when waste or toilet paper blocks the drain and prevents flushing.
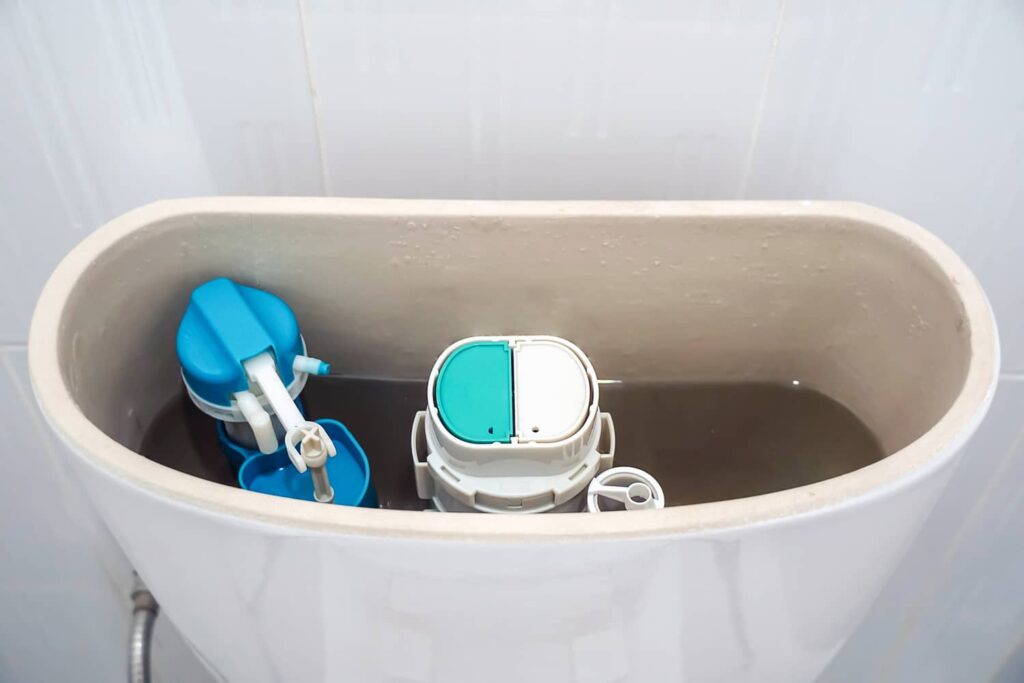
- Running Toilet: A toilet that runs continuously often has a problem with the flapper valve not sealing properly. Thus allowing water to flow from the tank into the bowl without stopping.
- Weak Flush: A weak flush can be due to a variety of issues. These include clogged holes under the rim of the toilet bowl or a low water level in the tank.
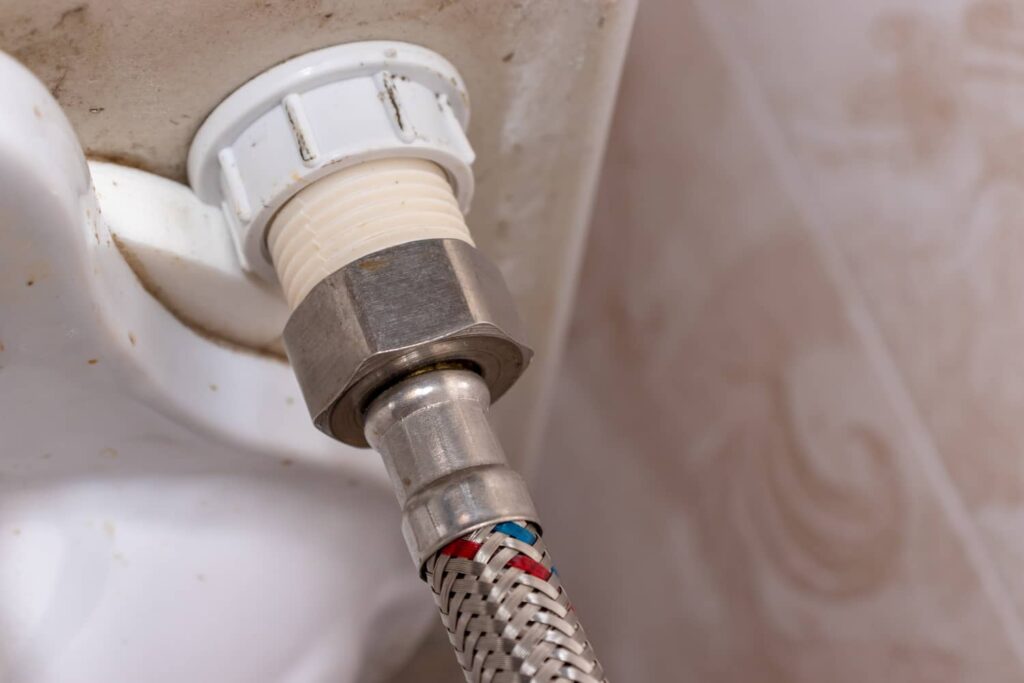
- Leaks: Toilets can leak from several places: the base, the tank, or the water supply line. Leaks can lead to water damage and increased water bills.
- Phantom Flushes: This phenomenon occurs when the toilet seems to flush itself due to a slow leak from the tank into the bowl, usually caused by a bad flapper or flapper seat.
- Toilet Won’t Flush: If pressing the handle doesn’t initiate a flush, there could be an issue with the lift chain or the handle mechanism itself.
- Noisy Toilet: Gurgling sounds or prolonged humming after flushing can indicate a blockage in the vent pipe or a problem with the fill valve.
- Slow Filling Tank: A tank that fills slowly may have a clogged fill valve or a problem with the water supply line pressure.
- Sweating Toilet Tank: Condensation on the outside of the tank, especially in humid conditions, can occur if the water inside the tank is much colder than the surrounding air.
- Loose Toilet Handle: A handle that wiggles or doesn’t activate the flush mechanism properly may need tightening or replacement.
- Cracks in the Porcelain: Cracks can develop in the tank or bowl, leading to leaks and potential flooding if not addressed promptly.
- Odor Issues: Persistent unpleasant odors can be due to bacteria build-up, leaks around the base, or issues with the wax seal.
Addressing these common toilet issues promptly can prevent more extensive damage and maintain the functionality and hygiene of your bathroom.
Tips on How to Prolong the Lifespan of the Toilet Handle
To prolong the lifespan of your toilet handle and prevent common issues, here are some tips. One of those is gentle use: Avoid applying excessive force when flushing. A gentle press is sufficient to operate most mechanisms. Another is regular inspections. Periodically check the handle and internal components for signs of wear or corrosion. Early detection can prevent complete failure. Cleaning it regularly can help keep the handle and surrounding area clean to prevent the buildup of grime that could affect its function. Additionally, tightening fittings. Ensure that the handle nut inside the tank is snug but not overtightened, as this can lead to cracking of the porcelain or damage to the handle.
Additional Steps to Keep The Toilet Handle Working
- Check the Lift Chain: The chain should have a slight slack to prevent it from being too taut, which can lead to stress on the handle and other components.
- Lubricate Moving Parts: If permitted by the manufacturer, apply a silicone-based lubricant to moving parts. An area where this would be good is the handle arm. This will help to keep parts operating smoothly.
- Avoid Hanging Items: Do not hang heavy objects, such as tank cleaners, on the handle or flush lever, as this can cause undue strain.
- Quality Replacement Parts: When replacing the handle or any internal components, opt for high-quality parts that are compatible with your toilet model.
- Proper Flushing Habits: Educate household members on what should not be flushed down the toilet. Examples are wipes, feminine hygiene products, and paper towels. Keeping things like these out will help you to avoid clogs and strain on the flushing mechanism.
- Adjust Water Level: Ensure the water level in the tank is set according to the manufacturer’s specifications to avoid overworking the flush mechanism.
- Replace Worn Components: If you notice the flapper or other parts showing signs of wear, replace them promptly. This will allow the toilet to maintain proper function and prevent leaks.
- Professional Maintenance: Have a professional plumber inspect your toilet periodically, especially if you notice any irregularities in operation.
By following these tips, you can help ensure that your toilet handle operates reliably. This will also extend the overall lifespan of your toilet’s flushing mechanism.
Other Toilet Maintenance And Issues
Now that you know about replacing a toilet handle, here are some other areas of
One is toilet overflowing. There are not many things that are worse than this. This is caused by a clogged drain, blocked vent pipe, or higher float and causes your toilet to back up and overflow.
Another is adjusting the water level in a toilet. To do this, it usually involves using a screwdriver to adjust the fill valve float in your toilet tank. If this doesn’t work, you may need to contact a professional for help.
Lastly, replacing the sewer line is very expensive. This is due to several factors. These are the complexity of labor, excavation process, utilization of materials, street and sidewalk repairs, and local codes and regulations.
When Do I Call a Professional?
If after following the provided steps the toilet handle still fails or if there are complications like a broken flush mechanism or leaks that you are unable to manage, it’s advisable to call a professional plumber. This is an important part of the toilet and you need to make sure that it is fixed correctly. A professional can do this for you.
Check out the video below about how to fix or replace a toilet handle. This may help you to see if it is something you can do or need a professional.
Conclusion
While fixing a toilet handle can be a straightforward DIY task, it’s crucial to recognize when the job requires professional expertise. Regular maintenance can preempt disruptions, but understanding the extent of one’s abilities is key to preventing further damage. A toilet is an essential part of the home and it needs to be working correctly. Reaching out to a professional is nothing to be ashamed of and this way you know that the job was done correctly. While you are taking care of the toilet, reach out to Edifice Inspections in Peachtree Corners, GA for a home inspection.